
Sometimes, when creating a dashboard in Tableau, you might miss something to complement your storytelling. Sometimes you just want to add emphasis to certain parts of the visualization. I ran into this problem last week, I was wasting time trying to find images with specific details and styles. To solve this I decided to create my own drawings and illustrations, with the specific characteristics I had in mind.
I decided to take the matter into my own hands and try to use the tool Procreate. This tool is an iPad app that, with an Apple Pencil, helps you to create art. You can create sketches, paintings, illustrations, or animations with unique features and intuitive creative actions.
Unfortunately, this tool is not free. But if you happen to already own it, it can become useful to boost your storytelling.
There is an abundance of tutorials to create beautiful illustrations on Procreate. Still, here I will teach you how to use your illustrations for your Tableau dashboards and trips and tricks that will ease the problems presented when blending these tools.
Here you can learn how to
- Choosing the size of your illustration
- Create a reference grid
- Select a color from your Tableau Dashboard
- Duplicate elements in your illustration
- Save your image without a background color
1. Choose the size of your illustration
A good design practice for your Tableau dashboards is to create a first sketch of it.
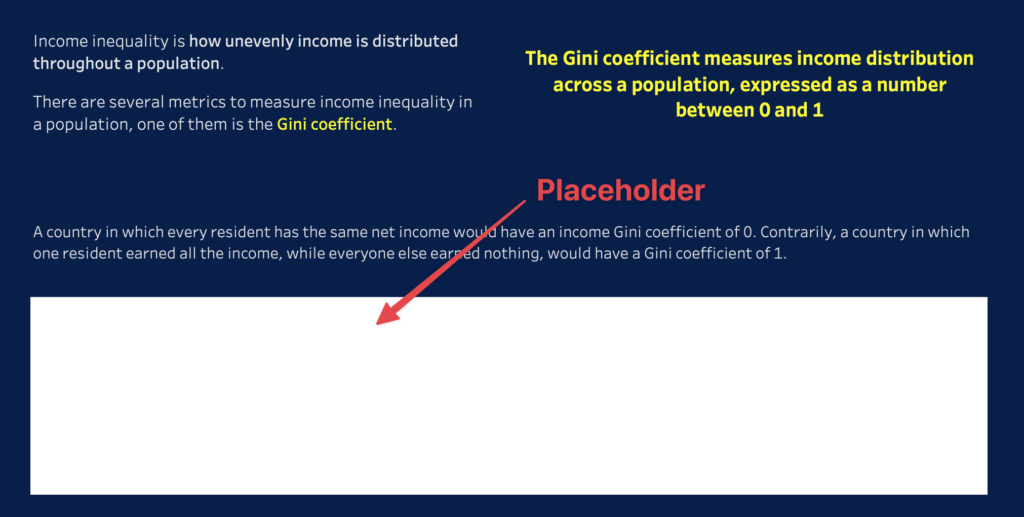
Once that sketch and design brainstorm is done, it is useful to start building your dashboard as how you envision it, leaving empty the spaces where you want your illustrations to be. Example: I placed a blank image as a placeholder for where I want my sketch to be.
After tweaking all details, you will now know what size your illustrations should be, now is when you can use the Tableau Layout Size (pixels) of your image to your advantage.
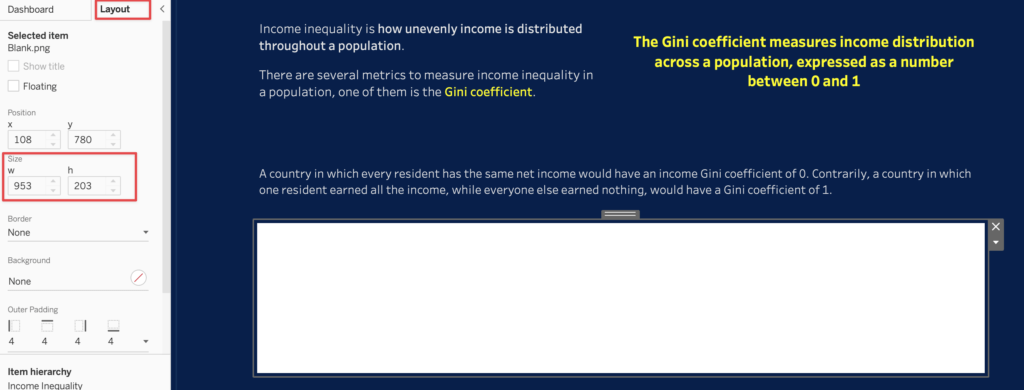
Knowing the exact measurements of your sketch can help you optimize your time by avoiding resizing, cropping, re-drawing, etc.
Once you know your exact image measurements, you go to Procreate’s Actions menu (the tool icon on the top left), select the Canvas tab and click the option Crop & Resize.
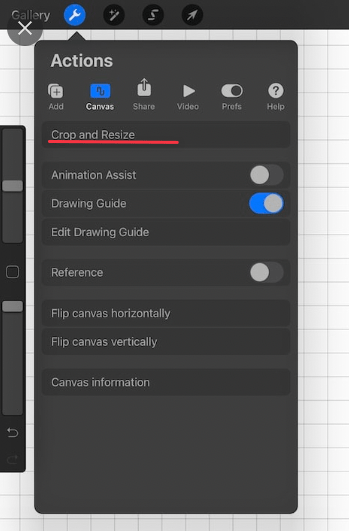
Once you are in the Crop and Resize window, click on the Settings option on the top right, input the same pixels as in your Tableau dashboard, and finally, click Done. This will generate and display a screen with the exact size you want your illustration to be. And now you can start drawing! This will save you the trouble of guessing how big or small and with what scale you need your sketch.

2. Create a reference grid
When creating an illustration we usually would like some kind of reference. This reference will help us guide, center, align or balance our design. Here is where the Drawing Guide within Procreate can aid us.
To display a grid, go to Procreate’s Actions menu, select the Canvas tab, and enable the Drawing Guide switch.
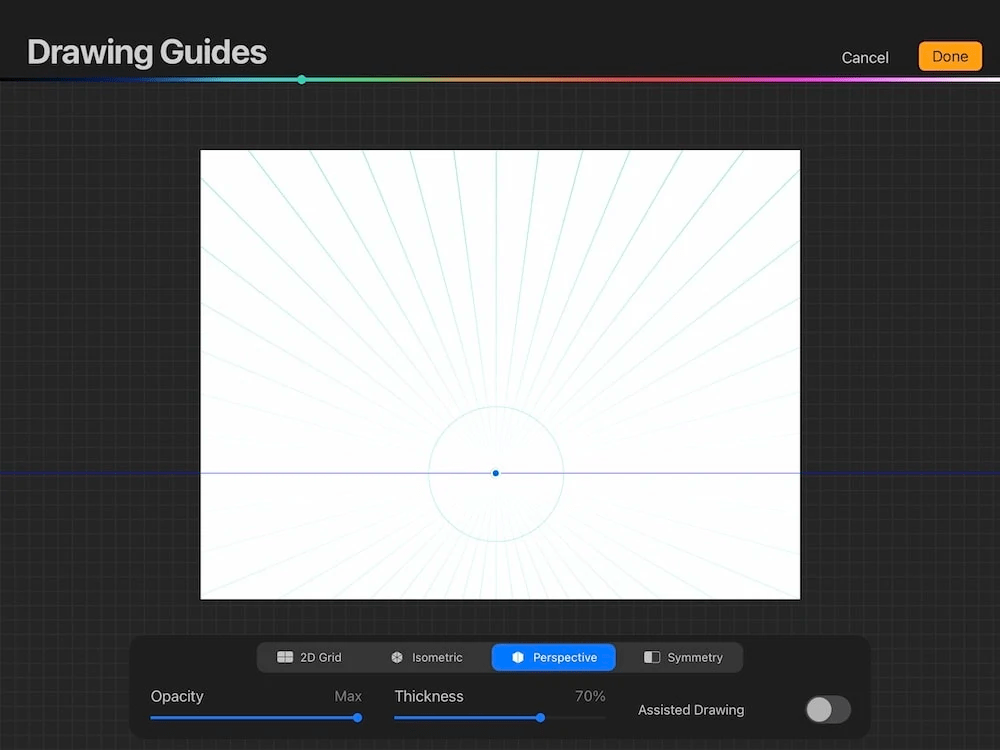
Then click the option Edit Drawing Guide, and you will find an arrange of options that you could use to aid your illustration. The one that I use the most is the 2D Grid, but feel free to experiment and use all the available features for your own needs.
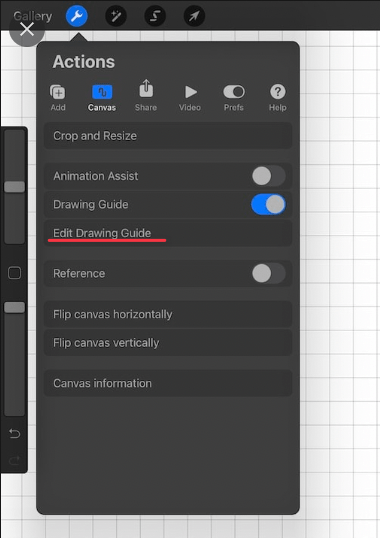
Tip: If you need assistance generating lines that match the grid you have chosen, in the Edit Drawing Guide options the Assisted Drawing switch enables you to match your strokes with the drawing guide selected.
3. Select a color from your Tableau dashboard
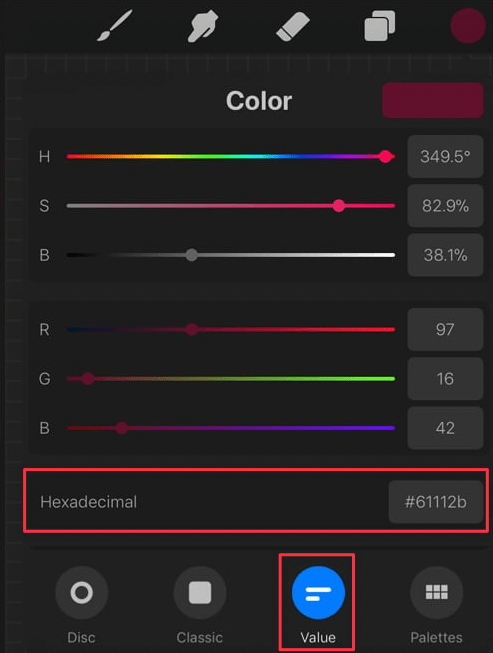
Sometimes you want to use a specific color in your illustration that you are using in your Tableau dashboard and Procreate doesn’t show a friendly dropper to be able to select your color from another window.
For this problem go to Tableau and figure out the Hex Colour number that represents the color you want.

Use this number and input it in Procreate’s Value Color menu
4. Duplicate elements in your illustration
On occasions, we don’t want to re-draw things we already created, or we want an exact duplicate of an element. For this purpose, layers will help us “copy/paste” selected elements.
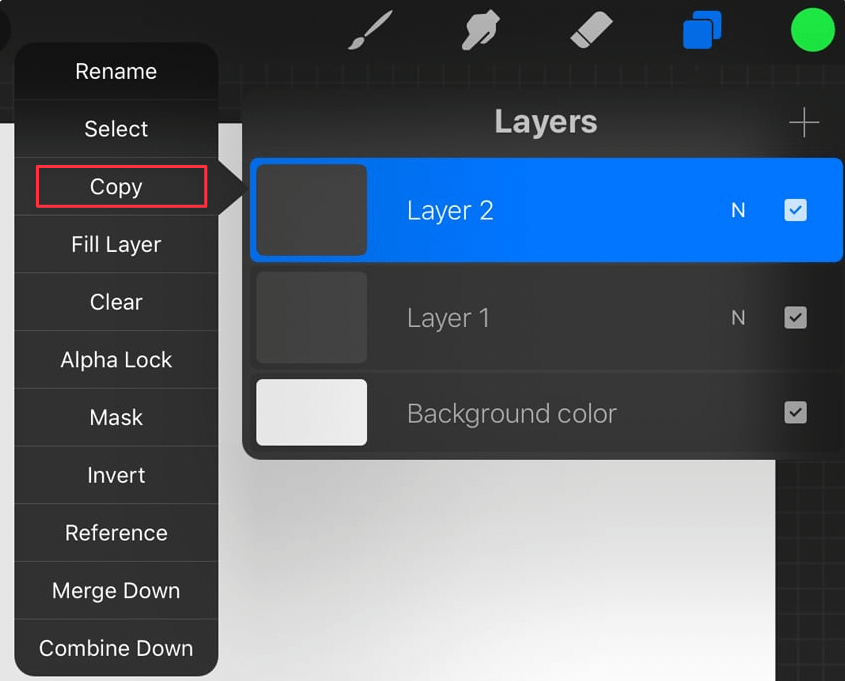
Identify the elements you would like to duplicate. Click on the Procreate’s Selection menu (ribbon symbol on the left hand side of the cursor icon)

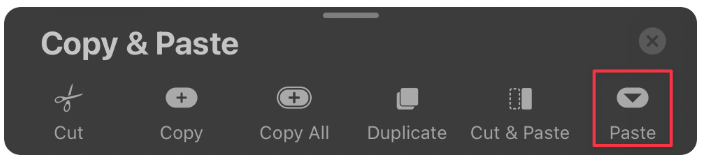
Select Freehand, Rectangle or Ellipse as how would you like to select your element(s) from the option’s menu below. Now select the element(s) you would like to duplicate and click the option Copy & Paste.
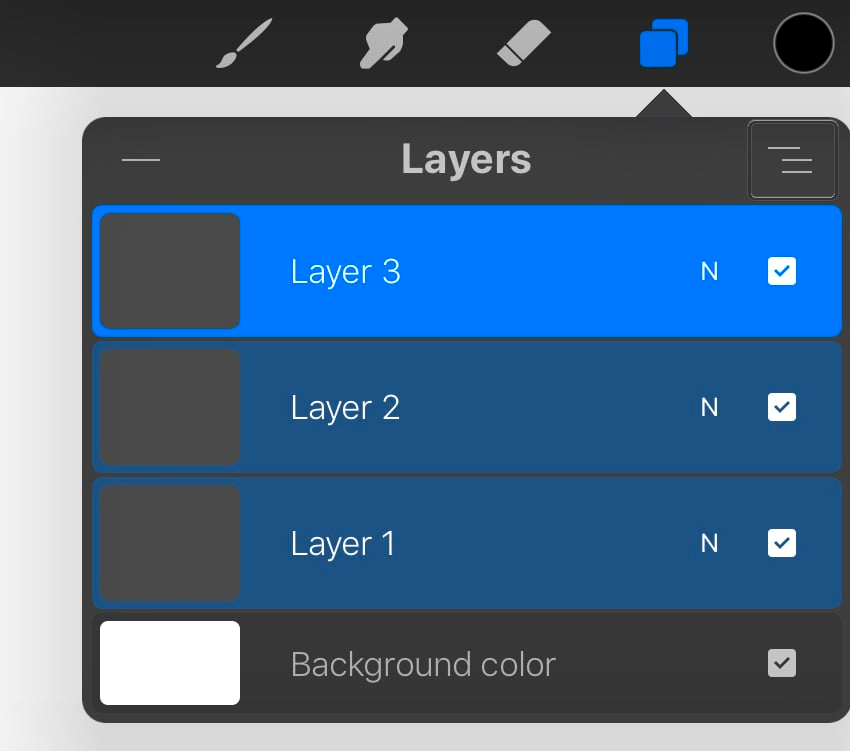
This will automatically create a new layer with only the selected element. You can see it by clicking on the Layers panel. This new layer can be deleted or un-selected if not desired; this is done by swiping the undesired layer to the left and clicking Delete or unselecting the checkbox.
Click on the image of the layer created and select the option Copy. Now with 3 fingers touch the Ipad and swipe/drag down. The Copy & Paste menu will appear and you can select Paste to duplicate the layer you had copied.
From there just move and adjust the element(s) you copied to the desired position and size.
5. Save your image without a background color
In most cases, the background we choose for our dashboard is not white, and we want our illustrations not to have a background. This is where the layering options are useful.
Once you finish your sketch go to the Layers menu and uncheck the option Background color to remove the background.
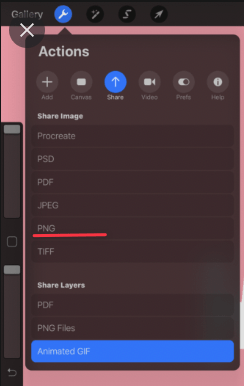
After your illustration details are finished (and you select that you DON’T want a Background color), go to Procreate’s Actions menu, select the Share tab and click on the PNG option. You can save your image in your preferred folder and use it for your dashboard.
For an example of what kind of illustrations you can add in Tableau check out my Viz.
Hopefullly these tips will help you implement your own ideas and design into Tableau!
Check out our blogs page to view more blogs on Tableau, Alteryx and Snowflake.
Work together with one of our consultants and maximise the effects of your data.
Contact us, and we’ll help you right away.