
One of our customers recently asked us how to make their dashboard open on the current week. “my data” they specified “contains future dates too. I would like to make sure that the dashboard opens on today’s week (e.g. week 36), rather than in the most recent data available in the database”. And lastly “further, I would like to still be able to select another week”.
So our goal is to build a dashboard that:
- Always opens showing only this week’s data
- Has the option to look into other weeks’ data
- Also works with databases that are not necessarily up to date or that include future dates (that is, cases in which max(2024) won’t do the trick).
As with (almost!) anything, there is indeed a way to achieve this in Tableau. The dashboard below is an example of how this can be achieved: you can download the workbook from my Tableau Public profile to follow along!
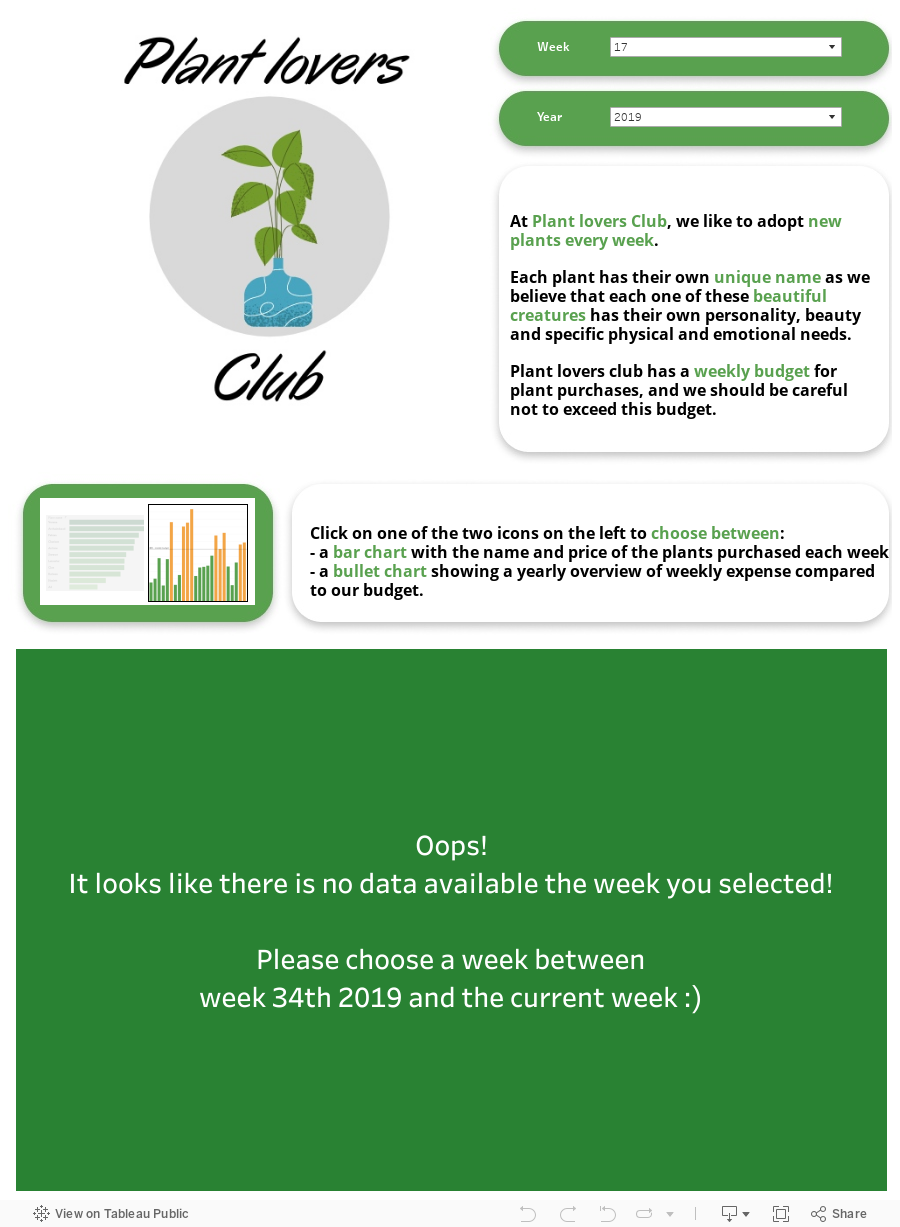
How to make your dashboard open on current week:
To achieve this goal, we will need to create
- A week parameter that is set on the current week whenever we open the workbook, and allows us to navigate to previous/later weeks
- A year parameter that is set on the current week whenever we open the workbook, and allows us to navigate to previous/later weeks
- A calculated field that will use both parameters and will be added to the view.
Set the dashboard to open on the current week’s data
To get started, we need to customize our date fields, so that they can be used in our week parameter. That is why we will create a “Week number” and a “Today’s week” calculated fields.
1. “Week number” calc
Firstly, we will need to create a calculated field that returns all the week numbers available in a year. Let’s call it “Week number” and use the following formula: datepart(‘week’, [insert date field name]). This field will return an integer.

2. “Today’s week” calc
Secondly, we will create a calculated field that returns the current week number, called “Today’s week” and with the following formula. This field will return an integer.
datepart(‘week’, today())

3. “Week” parameter
Once we have created the “Week number” and “Today’s week” calculated fields, we need to create a “Week” Parameter. Here is what it should look like:
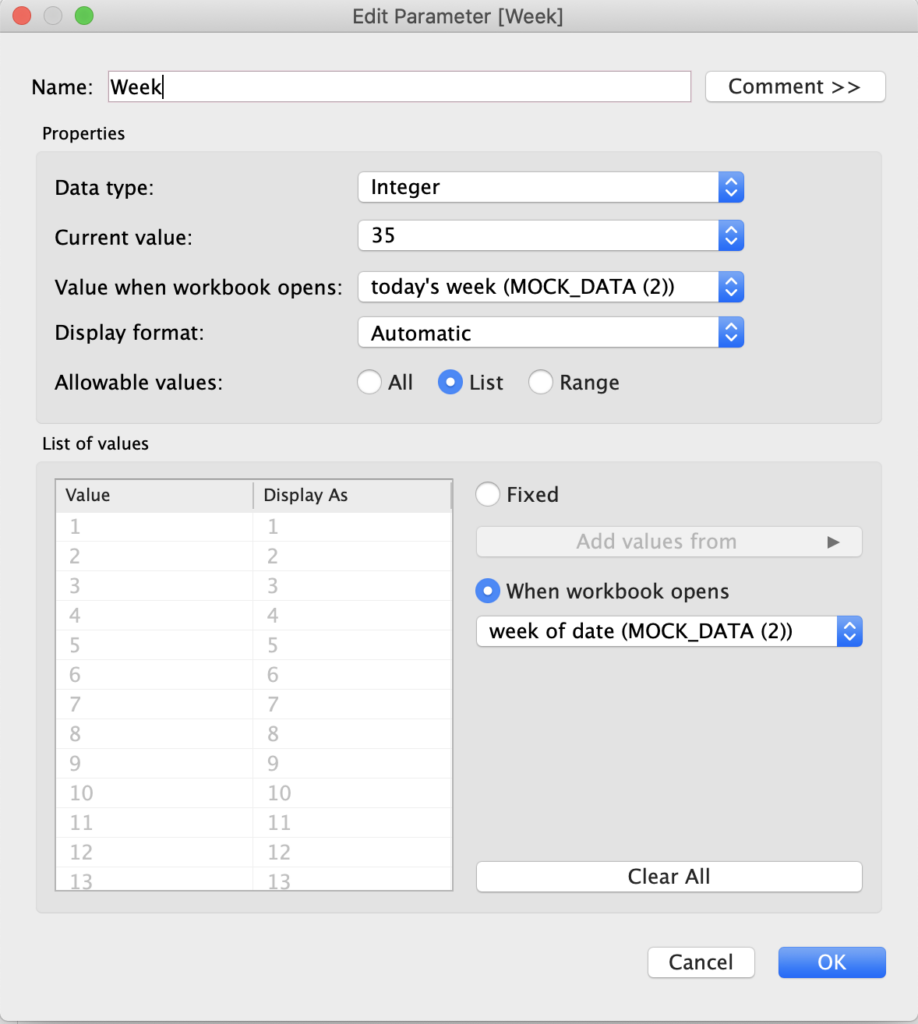
To achieve these settings (and save yourself some confusion) follow the instructions below in the order presented:
- Set the data type to integer
- Next to Allowable values, select list
- Under list, choose ‘When workbook opens’ and select ‘week of date’
- At last, next to “Value when workbook opens” on the upper part of the parameter settings, click on the arrows to open the drop down, and select “Today’s week”. This will make sure that the parameter will always be set to the current week when the workbook opens:

N.B.: It is important to specify this choice at the end of the setting. This is because otherwise “When workbook opens” under List of values will overwrite your choice.
Set the dashboard to open on the current year’s data
At this point, the dashboard should show only data for the week number of the current week.
However, if your database contains multiple year, the dashboard will show data from e.g. all available weeks 35 (week 35 2019, week 35 2020, etc). In order avoid this, and to allow the user to select which year they would like to look at, we are going to create the same calculated fields and parameters we just created, but this time for year instead of week.
- Create a “Years” calculated field (similar to the “Week number” calculated field):
datepart(‘year’,2024)

2. Create a “Current year” calculated field (similar to the “Today’s week” calc):
datepart(‘year’, TODAY())

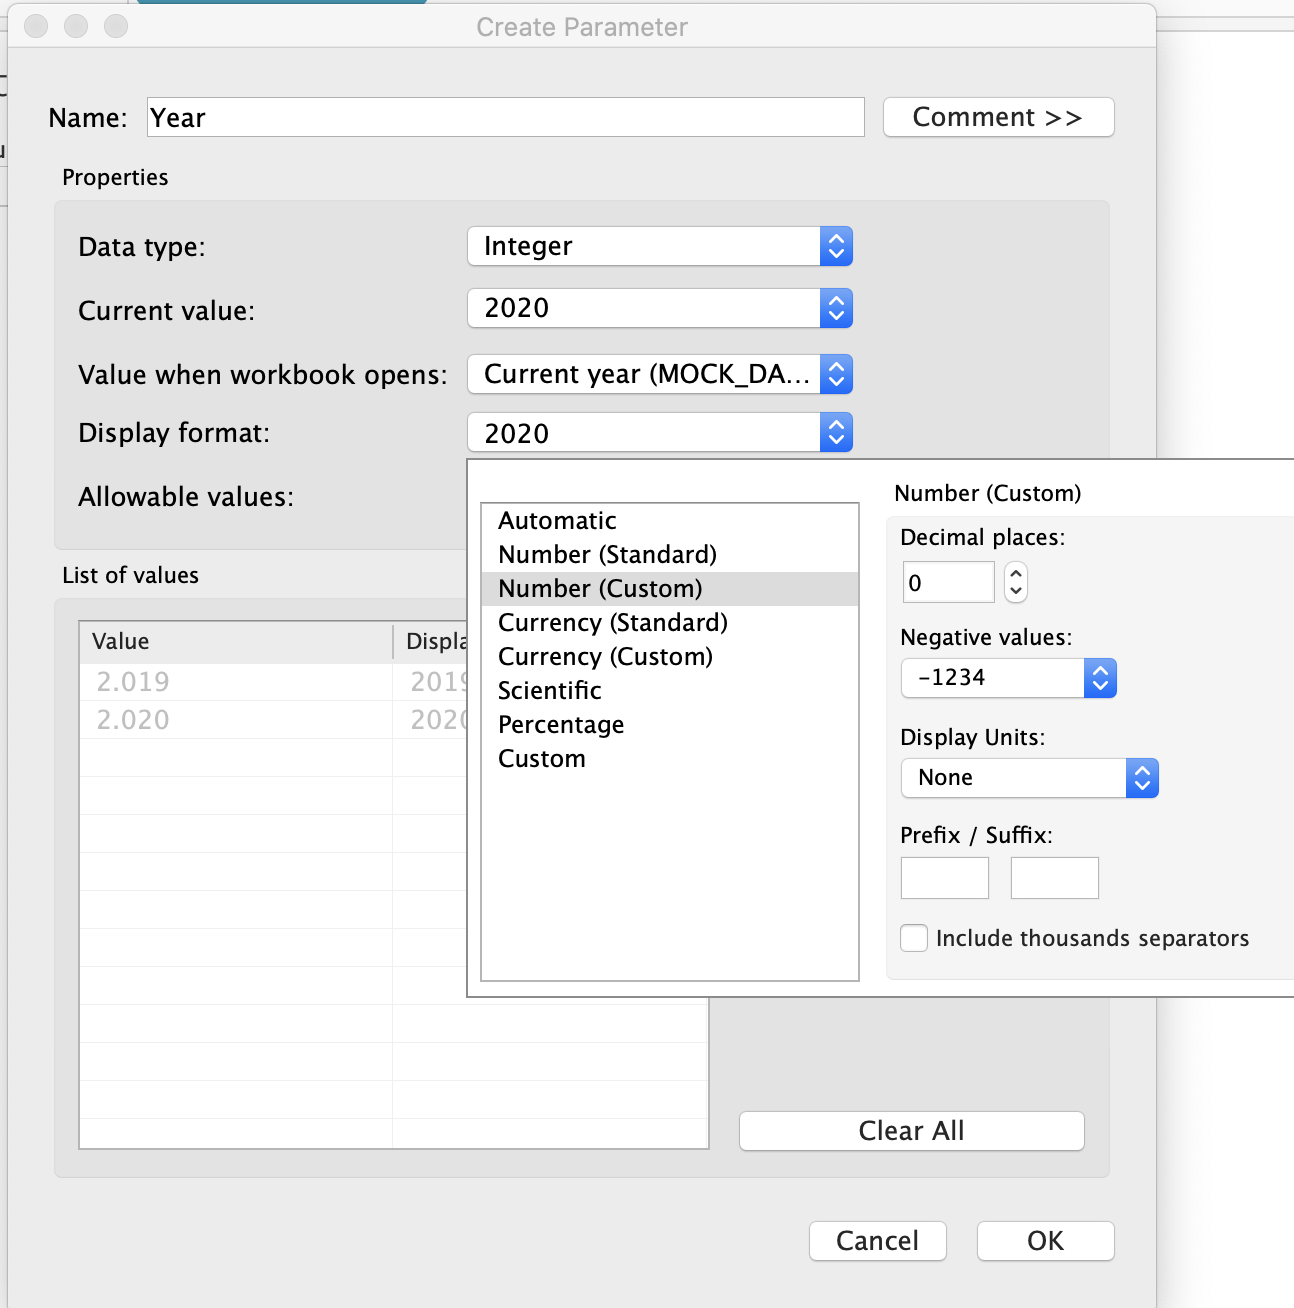
3. Create a Years Parameter, similar to the ‘Week’ Parameter we created previously. The instructions are the same: set data type as integer, select Allowable value: list, select ‘When workbook opens’ and set it to “Years”, and lastly select “Current year” next to ‘Value when workbook open’

A couple more tweaks, one calculated field and we can build our dashboard!
Congrats for making it so far! We just have a couple of tweaks left to achieve our goal.
- Convert the four calculated fields we have created so far (Today’s week, Week number, Current year, Years) into dimensions. This will allow you to avoid the automatic aggregation that occurs when we drag a measure into the view.
- Open the Parameter editor for our Year parameter and click on ‘Display format’ to untick the ‘Include thousands separators’ box. This way the years will be displayed as e.g ‘2020’ rather than in the confusing ‘2.020’ format.
- Create one last calc, that we will provisionally call “Date in view”
if ([Week number] = [Week] and [Years] = [Year]) then [insert measure here] else null end

- Add the newly created “Date in view” to Filters and select all values/
- Drag “Date in View” to text
- At last, drag “Week number” and “Years” to rows
- Right-click on the Week and Year parameters and select “Show Parameter”
- Et voilà! The dashboard will change values when changing the week and year number on the parameters, and will open on today’s week and year every time we open the workbook!
Wanna learn more about Tableau or Alteryx? Do you want to use these tools to their full potential? Check out our trainings and consultancy services!