
Single-Sign On with Snowflake Python Connector
Python plays an import part in Snowflake’s infrastructure: Snowflake’s command line client SnowSQL is built using the Snowflake Connector for Python. You can even write Python code inside Snowflake SQL using Python UDF’s, which is a really cool feature. Check this blog by Atzmon Ben Binyamin if you want to know more about that.
So it is not surprising that it is possible to directly connect to Snowflake from a Python script. Usually this can be accomplished in just a few steps. In this blog we will look at 2 ways to to establish this connection: first we will examine how to connect with a username and password and then we will look at how to connect with Single Sign-On (SSO), e.g. from Google. With SSO you can log in to Snowflake using your credentials from another party (such as Google). This may have some security benefits. It may also be the way the Snowflake connection is set up in your organisation (as it sometimes is in ours).
Installing the Snowflake connector
Python scripts can connect to Snowflake through the Snowflake Connector for Python. This is a module that can be imported directly in your script with the following line:
import snowflake.connectorIn order for this to work, the connector needs to already be installed. It is not included in the standard library. Installation is straightforward with pip (Python’s package manager). If you do not have pip working on your system, you might want to use ensurepip. If you have it, just enter the following line in the command-line (e.g. the Terminal on macOS) and press Enter / Return.
python -m pip install snowflake-connector-pythonConnecting with username and password
The connection can be established via the connect function (snowflake.connector.connect). This function accepts a number of arguments, but you will need at least account, user, and password in this case. For the remainder of the blog I am going to assume you set the following variables in your script. Fill in the values after the = so that your situation is reflected. What you need to fill in as your Snowflake Account Identifier may vary. Be sure to try different options if it does not work. Sometimes you just need your Account Locator, and sometimes you need your Account Locator, Cloud Region ID, and Cloud. Check out the previous link for more information.
YOUR_ACCOUNT = <your Snowflake Account Identifier>
YOUR_USER    = <your username for the Snowflake Account>
YOUR_PASS    = <your password for the username>
Now that we have the right variables set we can pass them to the connect function. We can pass them directly to the function:
snowflake.connector.connect(
        account=YOUR_ACCOUNT
        , user=YOUR_USER
        , password=YOUR_PASS
        )
But we can also put the credentials in a dictionary and call the function with a dictionary preceded by **. I personally prefer that method. See Python Glossary: Argument for more information. Essentially, the dictionary items are unpacked to keyword arguments.
credentials = {
    'account'    : YOUR_ACCOUNT
    , 'user'     : YOUR_USER
    , 'password' : YOUR_PASS
    }

snowflake.connector.connect(**credentials)
Passing a query
These scripts do not do anything yet. Let’s pass a simple query to the connection. In this example we will ask Snowflake who the current user is. Snowflake conforms to PEP 249 (see the Snowflake docs). That means we can use standard python database interaction (cursor, fetchall, close etc.), and we can also use a with statement!
import snowflake.connector

credentials = {
    'account'    : YOUR_ACCOUNT
    , 'user'     : YOUR_USER
    , 'password' : YOUR_PASS
    }

cnx  = snowflake.connector.connect(**credentials)

# create a cursor that can perform queries
cur  = cnx.cursor()

# execute a line of SQL
cur.execute('SELECT CURRENT_USER()')

# get the information from the cursor
text = cur.fetchall()
print(text)

cnx.close()
Alternatively, we could use a with statement so we do not need to close the connection afterwards. Python does that for us!
import snowflake.connector

credentials = {
    'account'    : YOUR_ACCOUNT
    , 'user'     : YOUR_USER
    , 'password' : YOUR_PASS
    }

with snowflake.connector.connect(**credentials) as cnx:
    cur  = cnx.cursor()
    cur.execute('SELECT CURRENT_USER()')
    text = cur.fetchall()

print(text)
Using Single-Sign On
We did most of the work! We only need a small adjustment to make the connection work with SSO as well. Sometimes it is better to log in through the browser and this may be necessary in your situation. If we want Python to open up a browser window and let you identify yourself with Snowflake through your Identity Provider (IdP), change 'password' to 'authenticator' in the credentials dictionary and set its value to 'externalbrowser'. The rest of the script remains the same.
import snowflake.connector
credentials = {
'account' : YOUR_ACCOUNT
, 'user' : YOUR_USER
, 'authenticator' : 'externalbrowser'
}
with snowflake.connector.connect(**credentials) as cnx:
cur = cnx.cursor()
cur.execute('SELECT CURRENT_USER()')
text = cur.fetchall()
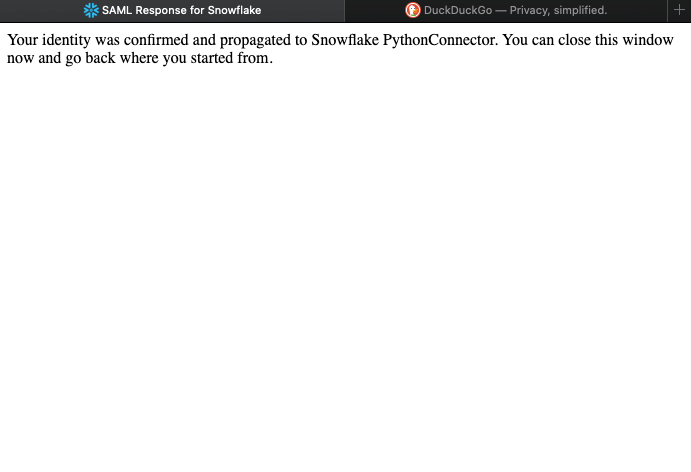
print(text)After you logged in through your IdP, you should see the following screen and your script might already have produced the results you were looking for. Keep in mind that in this scenario you would have to identify yourself through the browser every time you run the script! Which can be a bit tedious.
Conclusion
We looked at connecting Python to Snowflake through the Snowflake Connector for Python. We used both a connection that uses a password and one that uses authentication through the browser (with SSO). I hoped you found this blog useful. Make sure to visit our site The Information Lab NL to see more blog posts, training and consultancy services regarding Tableau, Alteryx and Snowflake.