Tableau Currency Exchange calculator
Some months ago I started dabbling into ETFs. With a need to note down some numbers and I came into contact with Google Finance API. Combined with Google Sheets it offers an easy way to play with financial data. To get my feet wet I started with some currency data only. I then decided to pull the data into Tableau and build a Currency Exchange Calculator from scratch… in Tableau.. why not after all.
Caveat: Don’t expect wonders from this API, it is not supported. There are other APIs on the market you can choose from for various financial data sets.
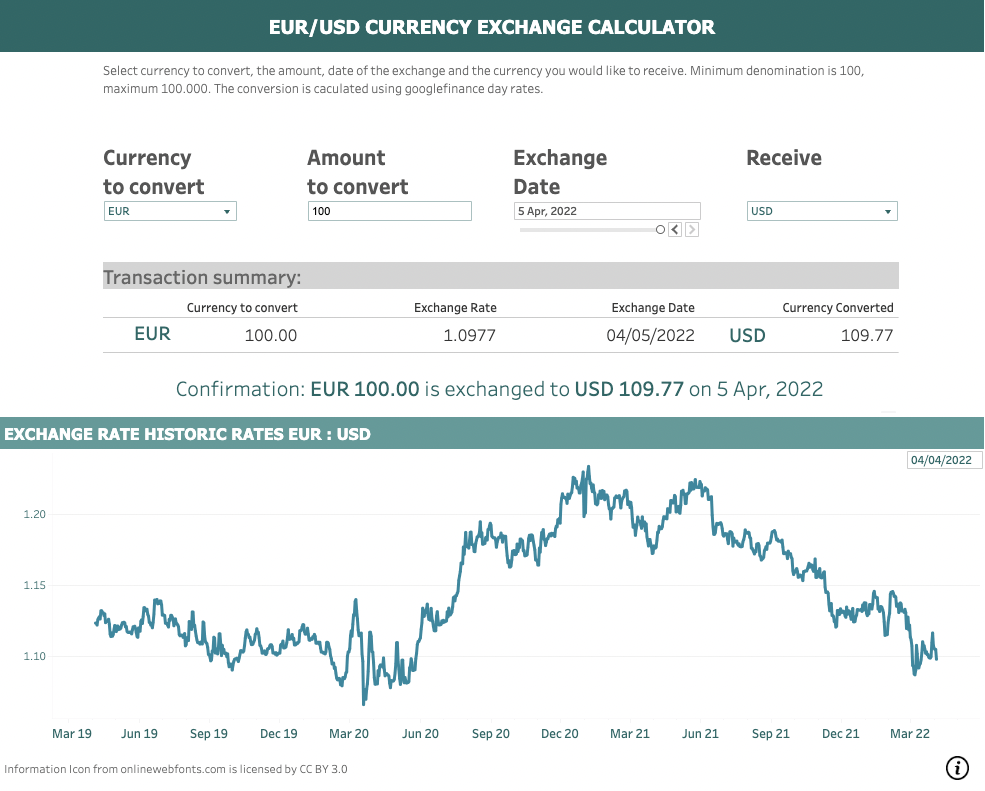
Below you see what the Tableau Currency Exchange calculator looks like. I kept it simple and made it recognizable as a financial tool by using green tones also often used by banks around the world.
Try it out!
1. Get your data going
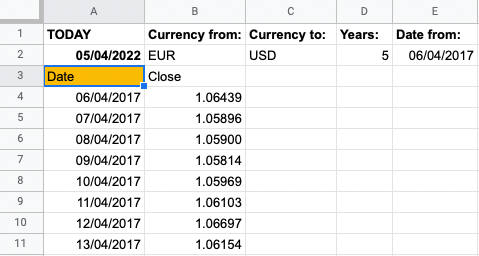
To get data I used a google sheets file to retrieve the data with the following Googel Finance code:
=GOOGLEFINANCE(CONCATENATE("CURRENCY:", $B$2, $C$2), "price", DATE(year($E$2), month($E$2), day($E2)), DATE(year($E$2)+$D$2, month($E$2), day($E$2)), "DAILY")
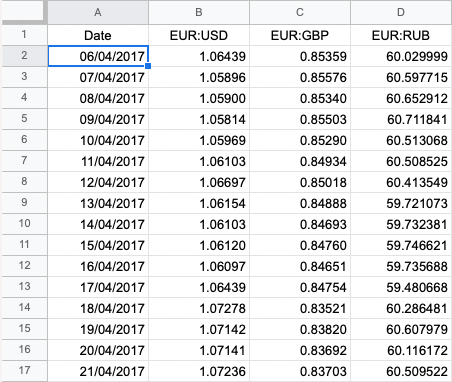
The code will automatically populate 2 rows downwards. I have chosen 5 years of data. Besides the EUR and USD I added EUR:GBP and EUR:RUB.
I combined the 3 pairings of exchange rates into one sheet with an importrange formula.

2. Create the Calculator
Once connected the data is available. You should have atleast a Date and 2 to 3 exchange rates.
A. First create the Parameters for user input
I. A date Currency to convert from.
I have chosen to convert only EUR and USD. More on this later.
Name: p_Currency Converted, Data type: String, Current value: whichever you like. List of values: EUR and USD.
II. Amount to convert.
Name: p_Calculator Input, Data type: Float, Current value: whichever you like. Set a display format and Range of Values. Step size as 1 is fine. Min and Max as you need. I used 100 and 100.000 respectively.
III. Currency to convert to. The setup of the parameter is the same as the currency exchanging. Set name as p_Select Currency. Create a list of currencies you have the exchanges for. In my example file this is EUR and USD, GBP and RUB. I kept it limited to maintain a simple example.
Show these Parameters.
B. Date Filters
A single value Date filter has to be created for the calculator. You can make it simple or various nifty features like a filter that is auto filtered on the max date available. I kept it simple in the linked Public Viz (though I was working on a nifty filter.. another blog maybe).
A date range filter for any trend graphs you like to show.
C. Calculated Fields
The first Calculated Field is tasked with returning the correct Exchange Rate based on the selected parameter value for the currency received. I have chosen an easy, but not very elegant solution:
c_Select Currency:
IF [p_Select Currency] = "GBP" THEN [EUR:GBP]
ELSEIF [p_Select Currency] = "RUB" THEN [EUR:RUB]
ELSE [EUR:USD]
END
The second calculated field is not needed. It is a remnant from developing the calculator.
c_Calculator Input:
[p_Calculator Input] * 1.00
The third Calculated Field, ‘c_Currency Converted’, is the actual calculator. The amount of elements in your calculator will depend on the amount of exchange rates options in the p_Select Currency. I have chosen for limited complexity with just 1 additional currency besides the EUR.
c_Currency Converted:
IF [p_Currency Converted] = [p_Select Currency] THEN [c_Select Currency] / [c_Select Currency] // this is always one.
ELSEIF [p_Currency Converted] = "USD"  AND [p_Select Currency] = "EUR" THEN 1 / [c_Select Currency]
ELSEIF [p_Currency Converted] = "EUR" THEN [c_Select Currency] / 1
ELSE [c_Select Currency] * 1 / [EUR:USD]
END
The IF statement will cover the EUR:EUR and USD:USD conversions and return 1. Thereafter the ELSEIF & AND statement ensures that any USD to EUR converts correctly. Standalone ELSEIF ensures any EUR to non-EUR (so USD, GBP or RUB) converts correctly. Finally, the ELSE statement is for any USD to non-USD or non-EUR (GBP or RUB). The final Calculated Field ‘c_Calculator Output’ takes the user’s amount and multiplies it by the correct exchange rate as calculated in ‘c_Currency Converted’ above.
This might not be immediately intuitive. See below schematic to clarify the combinations:

* RUB is treated like GBP.
The last calculated field gets you your money’s worth. It is a simple multiplication of the user entered amount times the applicable exchange rate for the currency pair.
c_Calculator Output:
[c_Calculator Input] * [c_Currency Converted]
3. Bringing it all together
Once done it is a question of preparing the Worksheets needed for the Dashboard. Dragging them into your preferred position and ensuring Dashboard filters are correctly enabled. In my Calculator I have several small other elements to create the Viz. Go check it out at public.tableau.com.

Hope this blog was insightful!
If you want to read other blogs about software like Tableau and Alteryx, follow a training course or book a consultant please visit The Information Lab NL for more information.
Blog tile Title Image by Gerd Altmann from Pixabay


